Thursday 27 February 2014

The Twirliest Twirly Skirt

Redondo Collage

I was disappointed when I bought the book "Sewing Clothes Kids Love" and realised that this pattern was not included. Sure, there is a great picture of a rainbow Redondo in one of the first few pages, but sadly, no pattern. It is still a great book, though - I promise! So, when Lisa of Crafty Mamas, linked to this pattern in her shop from Facebook a couple of weeks ago, I was sold. It was probably less than two minutes after she posted the link, that I was checking out my purchase on Paypal. This was one of those patterns that I had wanted for a while.

Redondo Hem Detail

Once I had the pattern in my hot little hands, I went stash diving and found some of this West 22nd Floral Delight, that I purchased from Spotlight about five years ago. I just managed to squeeze this skirt out of what I had with barely a scrap to spare. I popped into my LQS and found some ric-rac trim to add to the edges, using this great little tutorial. There is quite a bit of hem to trim, about five metres all up. I used the blind hem on my sewing machine and it was pretty slow going, but I love the final result.

DSC01175


Tuesday 25 February 2014

Made For Me - January

New Look 6648

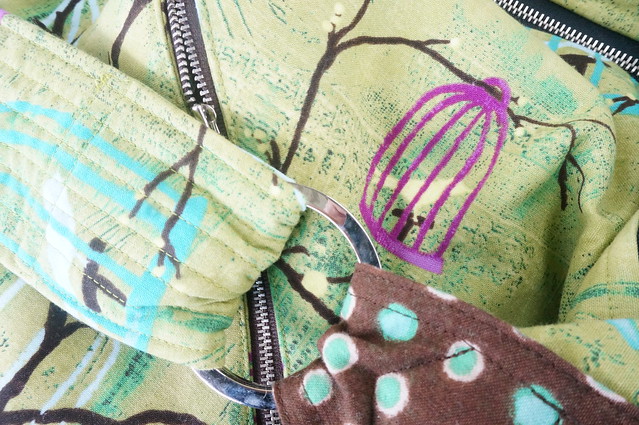
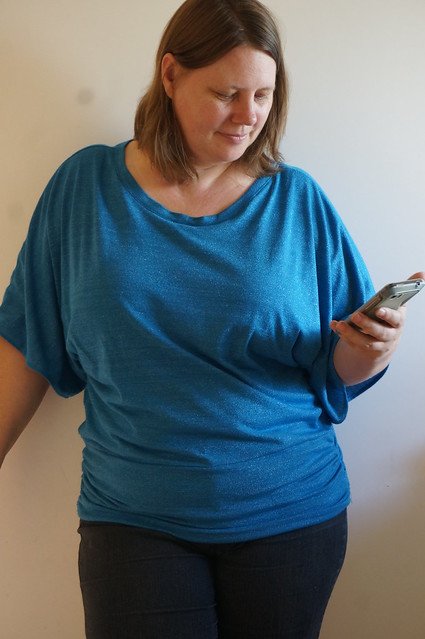
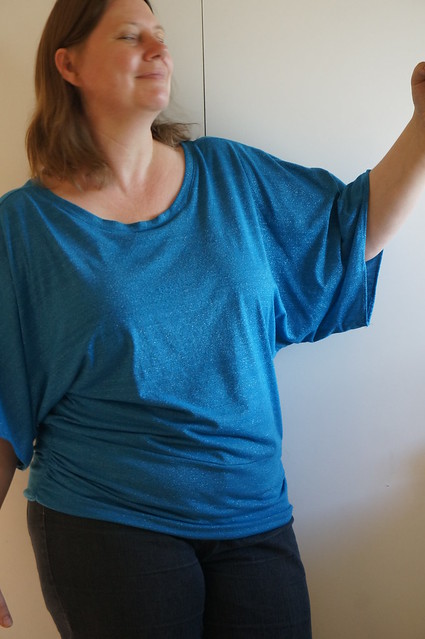
One of my little resolutions this year is to make at least one item for myself every month. My January "Made For Me" is this sparkly blue top. This fabric caught my eye when I was shopping at Spotlight before Christmas. Between it being on clearance, and having a special Spotlight save $40 voucher, the fabric for this top only cost about $5 or $6.

The fabric sat around for a while, waiting for the right pattern to come along. I knew I needed a knit pattern, but not a close fitting one. I really don't think that stretched out sparkles would be very flattering for me! One night, I was doing a bit of a search around and came across this pattern; New Look 6648 and decided that it was "THE ONE".


DSC01257

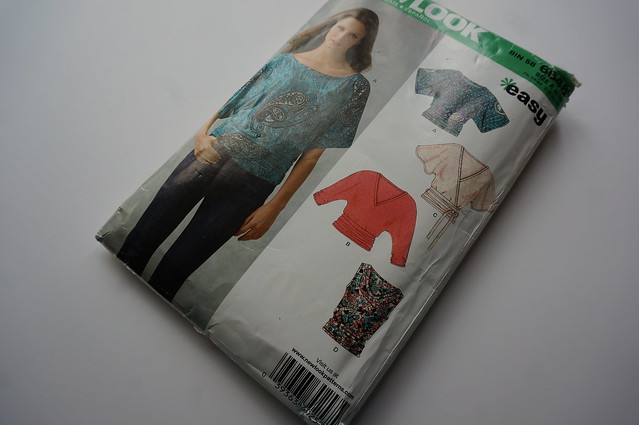
I kind of liked that it was down-loadable, but was concerned about some of the terms and conditions associated with downloading it, and asked some of my friends on facebook if they had ever purchased a digital New Look pattern. It turns out that no-one had, but one of my friends, Susan from The Brissmiths had the paper-pattern that she hadn't used, so I bought it from her.

A common problem I have with fitting is my long torso. Generally, patterns really only get bigger from size to size in the horizontal direction and there is very little difference in the vertical direction. Many patterns have a shorten/lengthen line for those who have a shorter or longer than average torso. This pattern does not have such a line. Concerned about the opening of the sleeves, I didn't really want to add any extra to opening edge of the sleeves, so I added the extra length to the bottom part, below the sleeve. After wearing the top, it could just as easily been slashed higher up, through the sleeve area and would have been fine.

New Look 6648

I also had another issue, and that is the chest measurement on the largest size was not quite big enough either. There is a lot of ease in the pattern, so it probably would have been okay, but I slashed and spread in the other direction too, outside of the neckline area, before the sleeves.

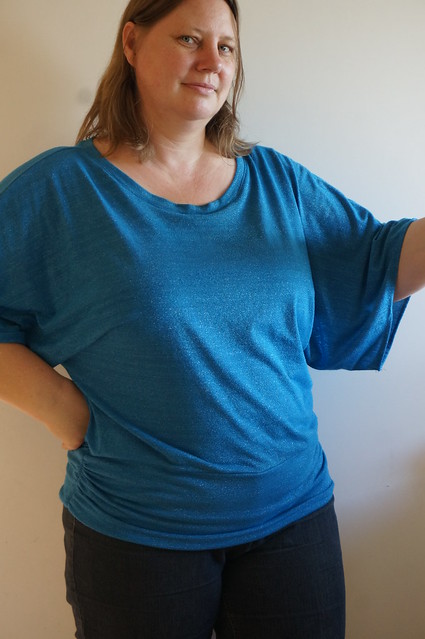
Upon researching other people's experiences, I found that a lot of people found the neckline a bit too wide. I brought mine in about an inch on each side. When I had it half-sewed together, I tried it on, and found the width of the adjusted neckline to be great, but decided that the boat-neckline style was not for me and scooped out the front a little. In the end, the whole length of the neckline was about the same, it was just narrower and scoopier. I ignored all the markings on the original pattern piece for the neck-binding and just quartered and pinned.

New Look 6648

Something interesting I noticed with the pattern is the lower band. In the instructions (and on the pattern piece), I noticed that it indicated the grain going across ways, rather than up and down - so the greatest degree of stretch would have been in the vertical direction, rather than the usual, horizontal direction. I found this a bit odd. From my observations, many other people who had made this top had made it with stripes and it was clear that they had not followed the pattern instructions, so neither did I.

So in summary, I took my pattern, I slashed and spread it horizontally, and vertically. I cut my lower band against the grain indicated in the instructions, totally changed the neckline and voila, I have a top that I LOVE!!! It still does look like the picture on the front though :)

Sunday 23 February 2014

Back To School

Noah's Art Smock

Noah started school this year, and I must say that he has taken to it like a duck to water. Only he isn't water-proof. Or paint proof. So I made him this art smock. I used the "Don't Look Now" art smock pattern, just as I did last year for Liam.

Pencil - pencil case

This year, Liam was able to use the same Art Smock, but he needed a new pencil case. To start off with, I made this pencil case, using this cute tutorial from Gwenny Penny. Whilst it is a cute pencil case, it is far too small for Liam's needs...

Liam's Pencil Case

...so I made him another one in a more suitable size. I didn't use a tutorial for this one, and pretty much made it up as I went along. There is plenty of room inside this one for all his pencils and textas.

Pencil Case - front zipper

The pencil case features an extra pocket on the side for all those little bits and pieces, such as his eraser, sharpener and his black-lead pencils for writing, whereas all his coloured pencils and textas can go inside the larger section. I think it would be nice to have a go at upsizing the other pencil case for Noah for next year when he needs a pencil case.


Pencil Case - inside

Monday 17 February 2014

Sneaky Peeks and a Skinny Stash

DSC00579

You may not know this, but one of my favourite pattern designers, Nikki (Nicole Mallalieu of You Sew, Girl!), has a new book coming out really soon. This will be her second book. Yes, she is THAT good. I did some pattern testing for the book last year, and I am not sure if I am able to show the full, finished bags, but above and below are some sneaky peeks for you (shh!).

DSC00580

The book is called The Better Bag Maker and from the small amount that I have seen, it will be jam-packed full of snazzy tricks to get a great finish to make beautiful hand-made (as opposed to "home-made") bags. It doesn't get released until May, but you can pre-order it now at a lower price from Fishpond* or from Amazon and I am sure, many other great retailers. I will try and remember to come back and show some photos of the full finished bags once the book has been released, if I can tear myself away from it long enough to make a blog post.

The Better Bag Maker

To create these wonderful bags, I used at least 12 FQs of fabric. I had to estimate as I didn't keep track, and sometimes fabric can get hidden inside pockets and these bags had plenty of pockets! Since these were made last year, they contribute to the SYST challenge. I also used approximately 3 FQs to make Amélie's Gingham Puppet Show Shorts. In addition to this, I gave away approximately 8 FQs of pale pink fleecy to my mum so she could make some things for my niece. It had been sitting in my stash for a while and I don't really do pastel colours. My friend, Amy (Badskirt) gave me some a metre of crazy fish fabric as well, so that adds 4 FQs back into the stash.


MY FINAL SYST 13 RESULTS!:
in = 144, out = 293, total = -149


In conclusion, I used more than double the fabric to what was added to my collection. My stash is over 35m of fabric thinner than it was 12 months ago. Whilst the totals weren't mega-huge, a lot of rather small things were made. A lot of what was added to my stash was given to me too, so my over-all spend was really quite low. I am really happy with the results, but it might be a while before I pay so much close attention to how much fabric I am using/stashing. I think I would rather just get down to it and sew, sew, sew!

My goal for this year is to sew more things for myself, at least one item a month, which I am keeping to so far, but that is another blog post!


Saturday 15 February 2014

Gingham Puppet Show Shorts

Gingham Puppet Show Shorts

I made these shorts back before Christmas, to go with Amélie's "Hollywood Cherise", but have struggled to get a photo of them on her. They get worn heaps, sometimes with the dress and sometimes with a t-shirt. The pattern is the Oliver + S Puppet Show Tunic and shorts pattern, which I think is possibly the cutest shorts pattern ever. You can get the pattern as a digital download from here.

You can see other items I have made using the pattern here, here, and here. I also did a little tutorial to get that perfect placement of the pockets which you can see over here.


Blogging tips