Monday 22 February 2010

Ooh - Aah! I made a BRA!

Back in November I did a bra workshop with some ladies from the Australian Sewing Guild. On that day, I created a UFO (unfinished object). Yesterday, I completed it.

I used pattern B003 from Booby Traps to make my bra, and was able to use different sized parts to fit my unique body shape. This one was put together using bits and pieces that we scrounged together from mum's stash for the class.

No more trying on bras in tiny dressing rooms for me, and no more spending ridiculous amounts of money on bras!

Friday 5 February 2010

Woo-hoo! Look what I can do!!

I have been wanting to learn how to crochet for a while now. I learned to knit when I was quite young (hmm, about seven?), but for some reason I couldn't get my head around crochet.


When I was pregnant with Liam, I knitted him (or her, because I didn't know) some bootees, I wanted to crochet then, because all of the cutest bootees were crocheted. Again when my niece was born, I wanted to crochet some bootees - instead I knitted these. I tried, I purchased and read instructional booklets, leaflets and even books on the subject, as well as watching YouTube clips, and online tutorials, but I just couldn't get it.

Until NOW!


Pip Lincoln of Meet Me at Mikes came to my rescue with this fabulous 
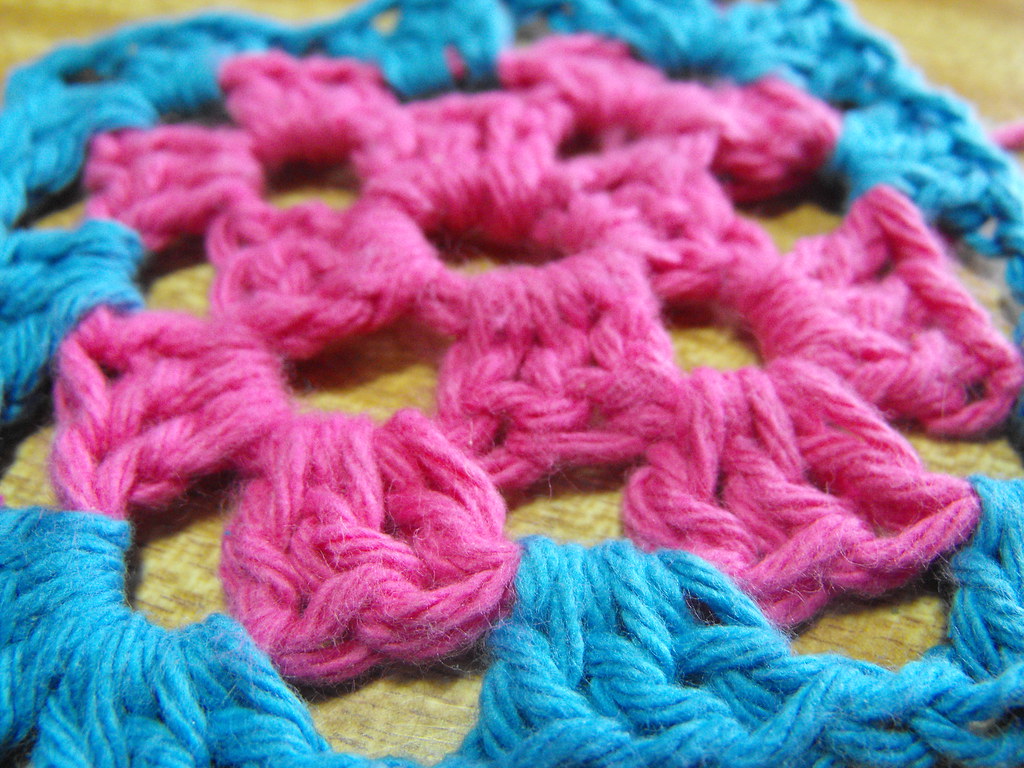
"Crochet School - How to Make a Granny Square" tutorial. Seriously, it is the best set of instructions I have seen. If you want to learn how to crochet, then you need to check this out! I started last night, and within a couple of hours, I had the gist of it. Pip breaks it all up into manageable steps with really, really good videos (that must have taken her HOURS UPON HOURS to create).

The pictures here show my very first granny square. Sure, it's rough, I need to practice more to get my tension more even and I haven't got to the bit yet where you tie in all the loose ends or join the squares together, but I am sure that will come soon enough. But it is my FIRST GRANNY SQUARE  and I couldn't be happier, thank you PIP!

Thursday 4 February 2010

Retro Rocket Tee


I made this t-shirt for Liam today. I used the "Octopus" t-shirt pattern from Ottobre 3/2008. I have made heaps of things from that particular magazine. I was a little unsure about the red for the neckband and cuffs, but I'm glad I went for red instead of safe, boring, reliable (and easily stained) white. The rocket is from the same set of embroidery designs as from Liam's hat from yesterday's blog post.

 
Actually, I did the embroidery last night whilst checking out other people's blogs, but I put together the rest of the t-shirt today, I even traced the pattern. The embroidery design reminds me of the Michael Miller Space Kids fabric.

Wednesday 3 February 2010

Rocket Hat


When taking pictures of small children wearing hats, I have found it is best to let go of any plans you might have, or ideas about poses. Just take lots and lots of photos, and hopefully you might get a handful that have both a child and a hat in them and are in focus. Giving the child a piece of fruit also seems to help.


This is the hat that I made at Sewjourn on Sunday. I didn't do the whole thing there, as I didn't fancy taking my entire sewing room with me. I had the embroidery done and the interfacing was bonded and the parts all cut out. I also made up a length of binding.

The embroidery is from a set called Space Cadets that I purchased from Embroidery Library. The fabric is Kokka - this one has astronauts and rockets on it, and I purchased it from This And That From Japan (along with another piece) using my $25 voucher that I won from True Up. The pattern (of course) is Nicole Mallalieu's Kids Hats pattern. I used pinwale cord that I purchased from Spotlight.

Tuesday 2 February 2010

Sunday at Sewjourn!

I was recently lucky enough to win a day for myself and a friend at Sewjourn. Sewjourn is a crafty retreat in the lovely, peaceful town of Lancefield. It's only an hour's drive from Melbourne (that makes it nearly three hours from me). If you want to have a get together with a bunch of crafty friends, you can book the 4 bedroom cottage and stay the weekend, whilst you use the nearby studio to craft and socialise.


I took my mum with me, and we left my place nice and early to arrive at Sewjourn at 9:30am. Upon our arrival, we were greeted with tea and coffee and scones with home made jam and whipped cream. This was followed by some crafting and lots of chatter whilst we checked out each other's crafty activities. I found this lady's work to be very interesting. There was also some needle-turn appliqué and garment sewing as well as some knitting.

We were then treated to a lovely lunch in the cottage, then back to the studio for some more crafting and chatter. It was nice to wander around and see what others were doing and some little tips were picked up along the way. My project (more about that later) was the perfect size for the day as I completed it just before afternoon tea, where we were treated to more scones and some delicious lemon slice before packing up and heading home.

I had a great day out, and really enjoyed being able to craft without having to deal with kids or housework at all (although I did think about the kids a fair bit during the day - but not the housework!). I would jump at the opportunity to go back there one day soon, but maybe for a whole weekend because six hours of driving is a bit much in one day.
Blogging tips